Here I go...

One Adventure After Another!

Friday, October 04, 2013

Meeting Up With Camino Friends

Tonight, I'm meeting up with Linda and Patty from one of our AnnieWalkers 2012 Camino groups!

Linda in her Altus Poncho

Patty makes a friend
Since their Camino, both ladies have been busy!

Linda quit smoking and is running in Portland this weekend.
Patty has been volunteering on the new Walking the Camino documentary.

Walking the Camino is playing in Portland, Oregon right now at the Hollywood Theater.
Click here to see the latest trailer:
Walking the Camino

I'll learn more tonight and post any updates and news!

Our 2014 trip is shaping up for May/June.
We have 4 open spots if anyone is interesting in walking with our group.
Joe Walsh will be leading the group.

Walking with a group is not only a way to experience the Camino with the support of others, it is a way to make lasting friendships like the one between Patty and Linda and I.

I hope you will consider walking with us in 2014!

Thursday, October 03, 2013

DIY Shower Diverter Valve Repair


We're learning that when you buy a house built in the 1940's, it comes with a whole other set of small problems and repair bills can add up!  So when possible, I like to fix things myself!

Yesterday morning I took a shower and it worked fine.
Last night, my son got home, got into the shower and when he turned it on, the wall groaned like it was going to split!  In addition, NO WATER came out of the shower head!

OH NO!

I got online and poked around and decided it had something to do with either the shower head or the shower diverter valve. The little mechanism that delivers the water to your shower head doesn't take a brain surgeon to figure out, so I thought, "I can fix that!"

Step 1.
I started by taking the shower head off to check and see if it was plugged up. We'd had a LOT of rain last week and there was lots of leaf debris in the rain gutters. I thought maybe somehow they might have also gotten into the water lines.

To remove the shower head, just unscrew it counter-clockwise.  That's to the left.  And if you can't remember which is which, remember "Righty-tighty and Lefty-loosy!


There WAS a bit of debris blocking the screen in the shower head, so I cleaned it out.


But then, I thought while it was off, I'd check to see if the valve was working.  I turned on the water in the bathtub, then turned the valve for the shower.  .  .  no water.

Step 2.
Tools.  I decided I would need a phillips head screwdriver, a pair of needlenose pliers, a crescent wrench, and whatever kind of wrench that big puppy is called!


Step 3.
Remove the handle. 
This bathroom faucet set has three spinning handles; one for hot, one for cold and one for the shower. 

 The handle was held on with one phillips head screw.


Once the screw was out, the handle just pulled right off.

Step 4.
Remove the cover. Grab hold and twist to the left.  In this case, I had to use a blade to cut through the caulking around the seam first. Then it just screwed right off.


Step 5.  
Remove the valve diverter.
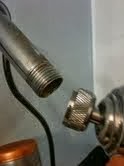
That thing you see sticking out is the valve diverter.
It is just slipped into the hole - not screwed - but there is an air seal that has to be broken. 
So we tugged and tugged and gently rocked it back and forth and couldn't get it out.

See that nut right inside the hole? That brass nut? Well, I managed to get those big locking pliers around it and turn it gently to the left. Just a wee bit and it came loose. Then I just pulled the valve diverter straight out of the hole.

This is what it looks like:


I looked it over and couldn't figure out where it might be broken.
The O-ring (white) seemed to be fine. 
There was a black O-ring on the end of it, held by a screw.
You can see this at the right end in the photo.
The screw didn't appear to be tight.
So I tightened it down.

Everything else seemed to look ok, so I thought I'd take a chance and just put it back in.
And guess what?

IT WORKED!

Hooray!
I just saved a HUGE plumbing bill and fixed my shower diverter valve.

One tip.
When you're turning on or off the shower, just turn the valve enough to get the water coming out of the shower completely.   If you over tighten it, you can unscrew the diverter from the inside, causing another problem.

So there you go.
A 61 year old grandma fixed the shower head.
Not bad, huh?

I encourage you to...

Love,
Annie

Sunday, September 29, 2013

Almost home!

I'm in California this week gathering  all that is left of my belongings. My son and I bought a house together in Portland. I return home Tuesday and should be settled in and back online within the week. This little town has no Internet. I had to run around the yard to get enough ticks to post this. Thanks for your patience!  Almost home!  Annie

Tuesday, August 20, 2013

DIY Crockpot Greek Yogurt - part 2

Once the milk has reached 180 Degrees F, 
turn off the crockpot, 
take the crock OUT of the pot, 
and let it sit until the milk cool to 120 Degrees.


Once the milk is cooled to 120, 
scoop out about a cup of milk and add it to your 1/2 cup of yogurt. 
Mix it well, 
then pour it BACK into the crockpot.


Put the lid on, 
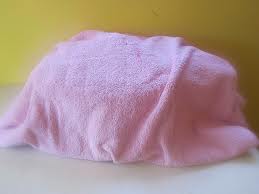
and wrap the crock well with a big bath towel or blanket.  

I put a cardboard box over the blanketed pot, 
especially in chilly weather, 
to keep off drafts and keep the pot warm. 

Some people put the pot in their oven, 
if they have a gas pilot light.  

The point is to keep the pot warm and out of drafts overnight 
or for up to 24 hours
depending on how sour you like the yogurt.
(By the way, my grandmother called this 
"clabbered milk" 
and it was never tossed,
but used in biscuits, breads, and pancakes.)


Next morning, unwrap the yogurt and take a look!
Put in a spoon, and this is what you should see:


My yogurt this morning looked more like this in consistency:


For me, it wasn't quite "done."
So I wrapped it back up and will let it sit out on the counter,
wrapped and warm,
for another few hours.

Once the yogurt is set up, you have some choices.

You can put it into other containers.
Baby food jars make great yogurt containers.


You like fruit on the bottom yogurt?
No problem!
Just put a spoonful of fruit 
or if you like it sweeter, "JUST FRUIT,"
in the bottom, then add the yogurt.
In the morning, take off the lid,
add a handful of granola,
and you have a healthy breakfast!


You can separate the whey from the curd by using cheesecloth 
or a thin white cotton cloth set over a strainer.  
If you leave it long enough,
then hang it for a while or squeeze it,
 you'll have yogurt cheese! 


The cheese looks like... cheese!


I've flavored this with garlic, salt, and parsley 
to make a really nice spread for crackers or to put in celery.


Store the whey in a glass jar with a tight lid.

The whey is good, and can be used in cereals or smoothies. 
Why pay for "Designer Whey" 
when you can make your own!?


 is also good for making breads, 
like pancakes!

You can whip up the yogurt with a whisk to make it smooth and creamier.

Or you can just eat it like it is!

Just remember to save 1/2 cup for your next batch.
Or buy a small container each time and make half a gallon!
Easy... and inexpensive.

It's time to get back to a simpler life.
Instead of depending on pre-packaging
and preservatives,
learn to be more self-sufficient.

Save money and
KNOW 
what you're putting into your body.


This is a good start:
Make your OWN yogurt!

And if this makes too MUCH yogurt for you?
How about using it in a recipe,
and making your own muffins or bread!
YUM!

Remember...

Love,
Annie

Monday, August 19, 2013

DIY Crockpot Greek Yogurt - Part 1


Do you like yogurt?
Do you know,
you can make your own
 for a fraction of the retail price!

Here's what you'll need.
 I've doubled this recipe and it works great!:

1/2 gallon Milk 
I am using 2% with no RBF. 
You can use organic or non-organic. 
You can use full fat or any percentage.
 I'm not sure if fat-free works, as I've never tried it. 
I have HEARD this recipe will work for soy yogurt, 
but I have not tried it.

1/2 cup Instant Dry Milk
The dry milk is optional. 
To me, it gives the yogurt a thicker, creamier texture that I like.
You can use organic or non-organic.


1/4 cup of live yogurt 
I like the Greek Yogurt - seems stronger - 
but any PLAIN yogurt with live cultures will work.


Cooking thermometer
I have an old glass candy thermometer, 
but any cooking thermometer will do. 
A digital type is especially nice.


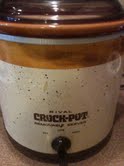
Crock Pot 
I have found for yogurt, 
the type that works best is the old style with a removable crock.
 I find the newer models get too hot.


Thick bath towel
This needs to be a nice, thick towel. You will use this to wrap up the crock overnight to keep it warm.

Spoon to stir
Any clean spoon will be fine.

Mason Jar with Lid or Bowl
For mixing the dry milk


Instructions:


Pour the milk into the crock pot. 
Hold back about 2 cups. 
I didn't measure, I just poured and left a little in the carton. 
If you are using an entire gallon of milk, 
you may not be able to put it all into the pot. 
Remember to leave room for about 1-2 cups 
of milk.

1/2 gallon milk in the crock pot.

Pour 1/2 cup of dry milk into the remaining 1-2 cups of milk and mix well.
I use a mason jar and shake the heck out of it. 
You can also mix it up in a bowl.
This step is OPTIONAL. 
Your yogurt will be fine without it, 
but this seems to make the yogurt a bit thicker and creamier, 
which I like.

I use a mason jar to shake up the dry milk with fresh milk

Pour the dry milk mixture into the crock pot. 
If you like, you can use a strainer.  
Stir well, put the lid on, 
and set the crockpot on LOW heat.

Bring the milk up to 180 degrees F.  

This will take between 1 and 2 hours, 

depending on your crockpot.  
Use a cooking thermometer to measure the temperature. 
A digital is nice, but I have an old-timer.  
My finger is at the 180 degree mark. 
It is on the LEFT, not the right.

My old candy thermometer


Now wait... 

I'll post part 2 in about 2 hours,