Once the milk has reached 180 Degrees F,
turn off the crockpot,
take the crock OUT of the pot,
and let it sit until the milk cool to 120 Degrees.

Once the milk is cooled to 120,
scoop out about a cup of milk and add it to your 1/2 cup of yogurt.
Mix it well,
then pour it BACK into the crockpot.

Put the lid on,
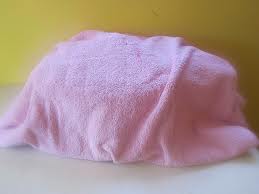
and wrap the crock well with a big bath towel or blanket.
I put a cardboard box over the blanketed pot,
especially in chilly weather,
to keep off drafts and keep the pot warm.
Some people put the pot in their oven,
if they have a gas pilot light.
The point is to keep the pot warm and out of drafts overnight
or for up to 24 hours
depending on how sour you like the yogurt.
(By the way, my grandmother called this
"clabbered milk"
and it was never tossed,
but used in biscuits, breads, and pancakes.)
Next morning, unwrap the yogurt and take a look!
Put in a spoon, and this is what you should see:

My yogurt this morning looked more like this in consistency:

For me, it wasn't quite "done."
So I wrapped it back up and will let it sit out on the counter,
wrapped and warm,
for another few hours.
Once the yogurt is set up, you have some choices.
You can put it into other containers.
Baby food jars make great yogurt containers.

You like fruit on the bottom yogurt?
No problem!
Just put a spoonful of fruit
or if you like it sweeter, "JUST FRUIT,"
in the bottom, then add the yogurt.
In the morning, take off the lid,
add a handful of granola,
and you have a healthy breakfast!

You can separate the whey from the curd by using cheesecloth
or a thin white cotton cloth set over a strainer.
If you leave it long enough,
then hang it for a while or squeeze it,
you'll have yogurt cheese!

The cheese looks like... cheese!

I've flavored this with garlic, salt, and parsley
to make a really nice spread for crackers or to put in celery.


Store the whey in a glass jar with a tight lid.

The whey is good, and can be used in cereals or smoothies.
Why pay for "Designer Whey"
when you can make your own!?

is also good for making breads,
like pancakes!

You can whip up the yogurt with a whisk to make it smooth and creamier.
Or you can just eat it like it is!

Just remember to save 1/2 cup for your next batch.
Or buy a small container each time and make half a gallon!
Easy... and inexpensive.
It's time to get back to a simpler life.
Instead of depending on pre-packaging
and preservatives,
learn to be more self-sufficient.
Save money and
KNOW
what you're putting into your body.

This is a good start:
Make your OWN yogurt!
And if this makes too MUCH yogurt for you?
How about using it in a recipe,
and making your own muffins or bread!


Love,
Annie
And if this makes too MUCH yogurt for you?
How about using it in a recipe,
and making your own muffins or bread!
YUM!
Remember...
Annie


